Introduction
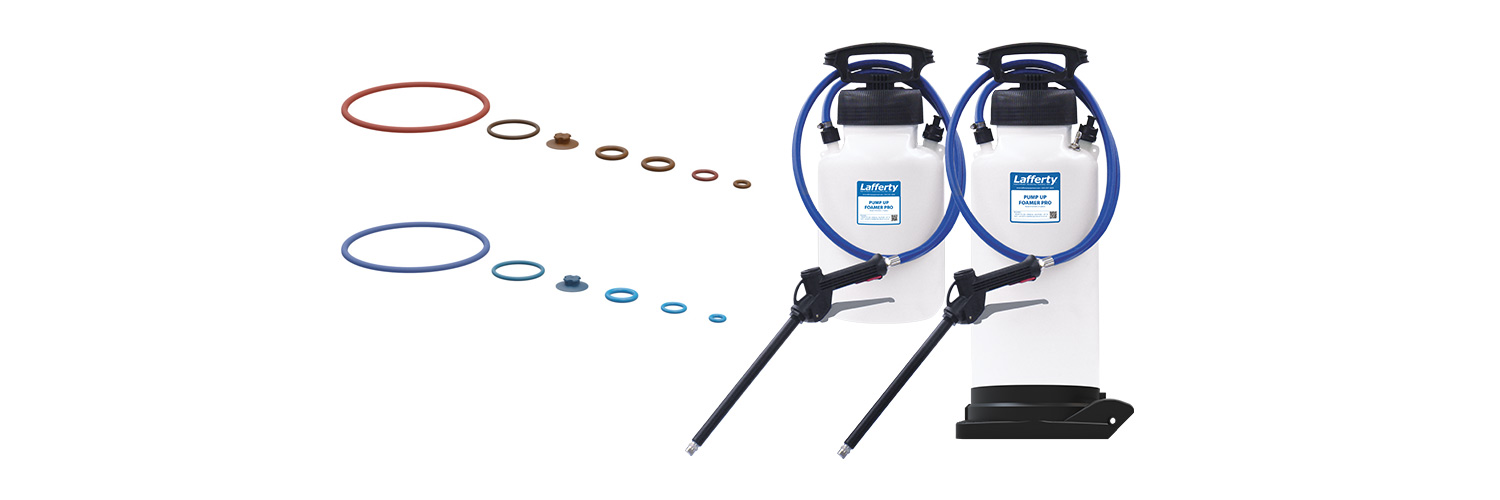
Pump-Up Foamer and Sprayers operate by using air in the pressurized tank to propel ready-to-use chemical solution. Therefore, it is critical to ensure that the tank is leak-free and all of the connections are 100% sealed. This is accomplished largely using o-rings to seal the gap between the lid and tank, as well as various other areas throughout the unit. These o-rings can decay over time due to normal wear and tear, chemical exposure, physical abuse, or other variables.
Sputtering output is the result of a broken or loose seal somewhere in the unit. The fix could be as simple as tightening the lid or other fittings, lubricating the o-rings regularly with a compatible non-water-soluble grease, or it may become necessary to replace one or more o-rings.
**Check out the Pump Up Foamer Parts and Customization Guide to learn more.**
- Tools Required

- Wrench
- Small flat-head screwdriver
- Pump-up repair kit (Viton shown, EPDM available. Select an appropriate seal material based on the chemical in use.)
- Lubricant – see end of instructions for recommendation
- Separate Pump Assembly

- Pull to separate the shaft from the piston and lid.
- You will encounter resistance, this is normal. The shaft assembly will “snap” in and out of place.
- Umbrella Valve

- The umbrella valve is a non-o-ring seal located at the bottom end of the piston.
- Gently slide the flat-head screwdriver under the edge of the valve. Do not scratch valve seat. Pull to remove.
- Simply snap the replacement into the hole. Ensure that the edges of the valve lay flat and form a good seal.
- Piston O-Ring

- Gently slide the flat-head screwdriver under the o-ring and grab and pull to remove.
- Replace with the matching replacement o-ring.
- Ensure ample lubrication with a non-water-soluble grease.
- TIP: Due to friction from pumping, ensure that this o-ring remains well-lubricated.
- Main Tank O-Ring

- Gently slide the flat-head screwdriver under the o-ring and grab and pull to remove.
- Replace with the matching replacement o-ring.
- Ensure ample lubrication with a non-water-soluble grease.
- Reassemble the piston / shaft assembly by snapping the shaft back into the lid.
- Air-Relief Valve O-Rings

- Using a wrench, loosen the pressure relief valve and remove it from the tank.
- Pull apart the two parts of the assembly.
- Gently slide the flat-head screwdriver under the o-rings and grab and pull to remove.
- Replace with matching replacement o-rings.
- Ensure ample lubrication with a non-water-soluble grease.
- Reassemble the two parts and reattach the assembly to the tank. Use caution to avoid cross-threading and ensure a snug (but not too tight) fit using the wrench.
- Hose Cap O-Ring

- Reach into the tank, grab the suction tube, and pull down gently to separate the tube from the cap.
- Using a wrench, loosen the discharge hose cap and remove it from the tank.
- This o-ring may be more difficult to access as it is seated deep in the well of the cap.
- Gently slide the flat-head screwdriver under the o-ring and grab and pull to remove.
- Replace with the matching replacement o-ring.
- Ensure ample lubrication with a non-water-soluble grease.
- Reattach the cap to the tank. Use caution to avoid cross-threading and ensure a snug (but not too tight) fit using the wrench.
- Recommended Lubricant

- Molykote 111 or similar silicone compound. Ensure that the lubricant is suitable for the chemical and o-ring material.