The “float valve” component is the same for all Level Master models.
Lafferty Level Masters detect low fluid level in a tank and use float valves to regulate the flow of water or compressed air. Unique configurations dilute chemical on demand, activate pumps, integrate with fluid control systems, and more. Regular cleaning and/or replacement may be required based on the operating conditions.
This video and guide describe the most common inspection and maintenance procedures for the float valve itself. Refer to unit-specific troubleshooting guides for issues with overall Level Master operation.
Video
Symptoms
- Primary float will not activate (tank does not fill).
- Primary float valve will not turn off (overfills or triggers secondary fail-safe float valve on double-float models).
Possible Causes and Solutions
- Secondary fail-safe float has been triggered (double float models only).
- Manually reset the secondary fail-safe float valve in the “down” position.
- Inspect the primary float assembly before resetting the secondary float valve. If necessary, troubleshoot the primary float assembly to prevent the secondary float from being triggered again.
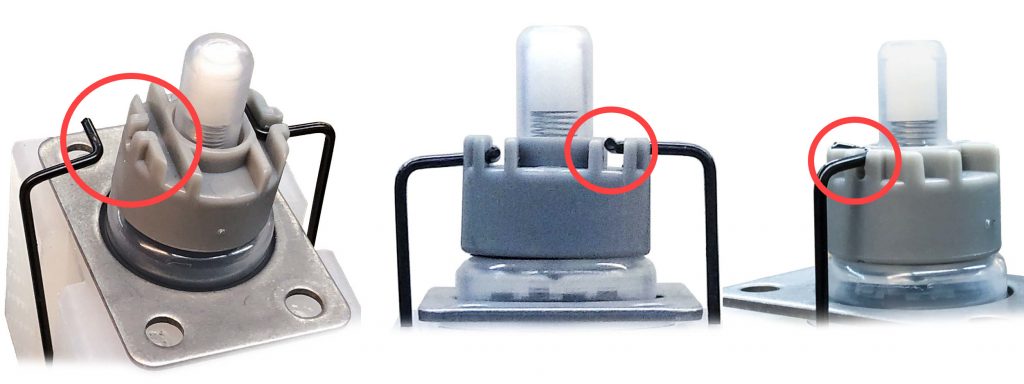
- Upward force has unclipped hanger from magnet holder.
- The wire hanger can become unclipped if upward force is applied to the float. This may occur inadvertently when handling the Level Master prior to, or during, installation.
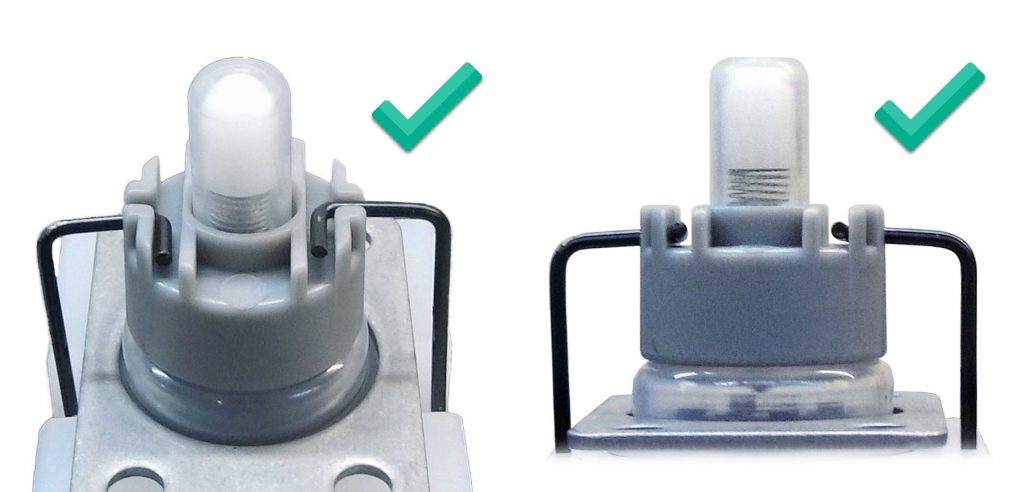
- Carefully remove float housing and align wire hanger to grooves in magnet holder.
- Pull down on wire hanger until you hear a sharp ‘click’ after the normal activation sound.
- Wire hanger must be fully seated in magnet holder grooves.
- Physical blockage or interference is preventing the float(s) from rising or falling.
- Ensure that the tank is on a level surface.
- Ensure that the float, push rods, and metal clips are hanging freely without any interference.
- Float valve parts are dirty or defective.
- Clean or replace the affected parts (may require careful disassembly, refer to parts diagram).
- Ensure that all parts are free of rust, grease, and loose metal chips.
- Ensure that the float valve diaphragm is not stretched out or damaged (replace if so).
- Depending on the type of chemical used and other operational variables, regular cleaning and/or replacement may be required.
Float Valve Parts Diagram
While the float valve mechanism is the same for all Level Master configurations, it is a best practice to refer to unit-specific parts diagrams on the main Lafferty website before ordering parts.
Model shown below for reference:
Air Level Master (No Tank)
Part Number: 989402